The Moloco and AppsFlyer combo is a powerful tool for media buyers driving traffic to mobile apps. While some affiliates blindly burn through budgets, others smartly connect analytics via a tracker, gain real performance data, scale efficiently, and squeeze the most out of every channel. In this article, we’ll walk through how to set up the Moloco + AppsFlyer integration.
The Moloco and AppsFlyer combo is a powerful tool for media buyers driving traffic to mobile apps.
While some affiliates blindly burn through budgets, others smartly connect analytics via a tracker, gain real performance data, scale efficiently, and squeeze the most out of every channel.
In this article, we’ll walk through how to set up the Moloco + AppsFlyer integration.
What is MOLOCO and Why It’s Valuable for Media Buyers
Moloco DSP is an in-app advertising network powered by machine learning. Campaign optimization is handled by AI, which trains on performance data to improve results. It’s suitable for both solo affiliates and businesses of all sizes. Some key benefits include:
- Smart traffic buying. Moloco’s AI automatically picks the best placements and manages auctions.
- Access to premium inventory. Ads are shown on Xiaomi, Vungle, Unity Ads, AppLovin, and IronSource. No need to manually launch campaigns across platforms.
- Automated retargeting. Moloco tracks user interactions and brings them back to complete target actions, increasing revenue per user.
- No strict moderation. With minimal moderation and no aggressive bans, it’s easier to promote gray offers.
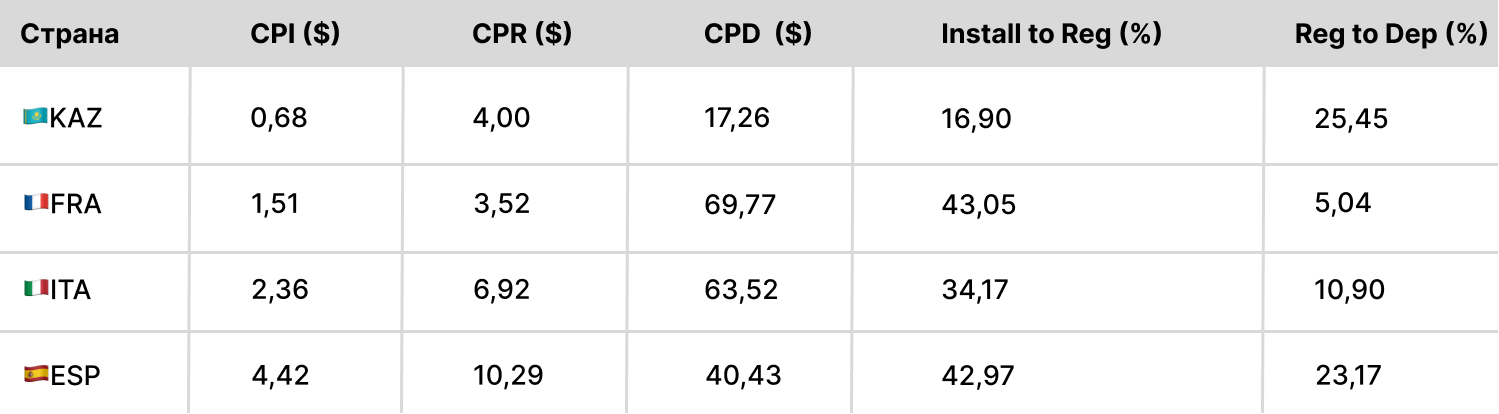
Moloco is widely used by affiliates, especially those working with Tier-1 GEOs. The platform’s main edge is its low install cost. Here's the GEO performance breakdown:
Why AppsFlyer is Essential for Analytics
AppsFlyer is one of the most popular mobile trackers in the market. It tracks the full user journey — from the first click to install and conversion. For running campaigns through Moloco, it’s a must — the platform can’t optimize properly without it. What this integration gives you:
- Real-time campaign data. See installs, conversions, and events by each campaign in real-time.
- Data flow to Moloco. The platform receives event data to train its AI — essential for performance optimization.
- Attribution & anti-fraud. AppsFlyer blocks suspicious sources and prevents fraud.
- User segmentation. Target retargeting based on user behavior.
AppsFlyer lets affiliates track ROI with precision, evaluate channel performance, and scale working bundles fast. Without it, running Moloco campaigns is just shooting in the dark.
How to Connect MOLOCO and AppsFlyer: Step-by-Step Guide
We’ll break the setup into three steps: registration, app integration, and the actual Moloco + AppsFlyer linking. If you're already registered and your app is added, skip to Step 3.
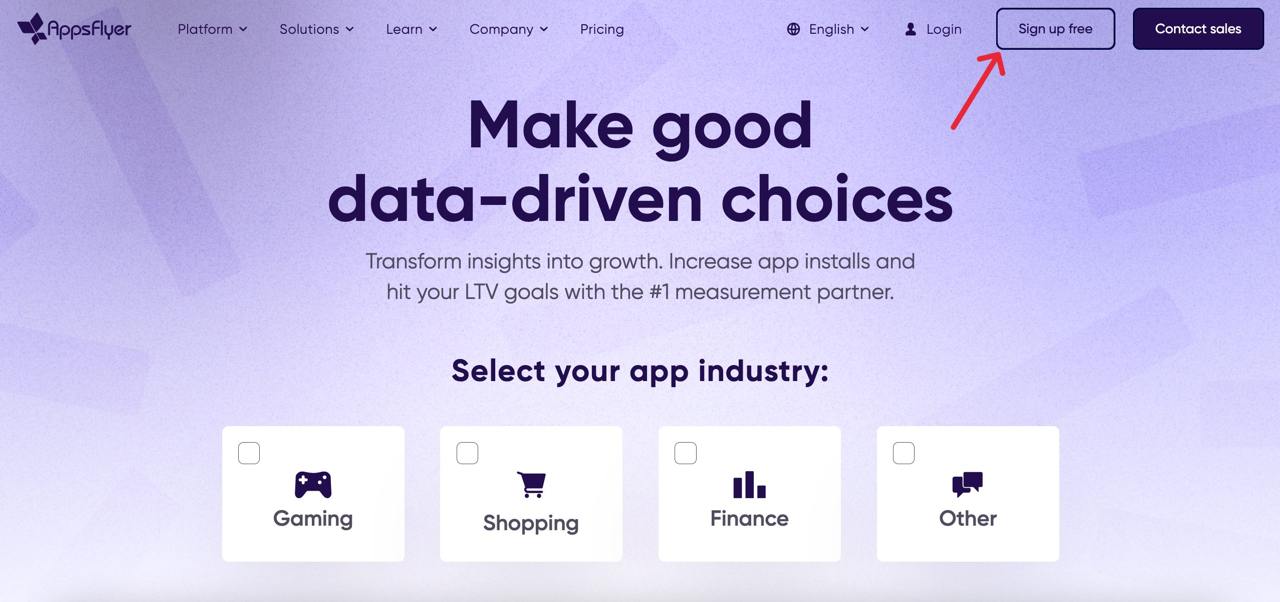
Step 1: Register on AppsFlyer
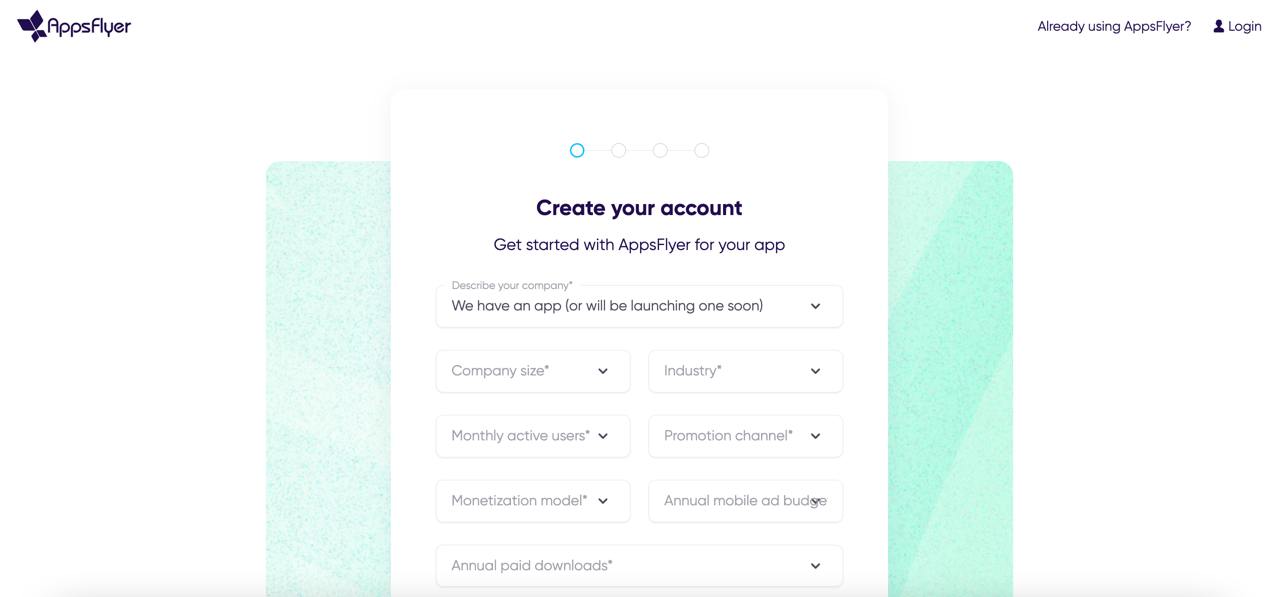
Head over to the official AppFlyer site and click “Start for Free.”
Then, fill in the usual details:
- Full name
- Phone number
- Region
- Password
You’ll also need to provide a company name, website, and position. These aren't verified, so you can use any random company info — we used a hardware store for testing.
Then confirm your email and log in.
Step 2: Integrate Your App
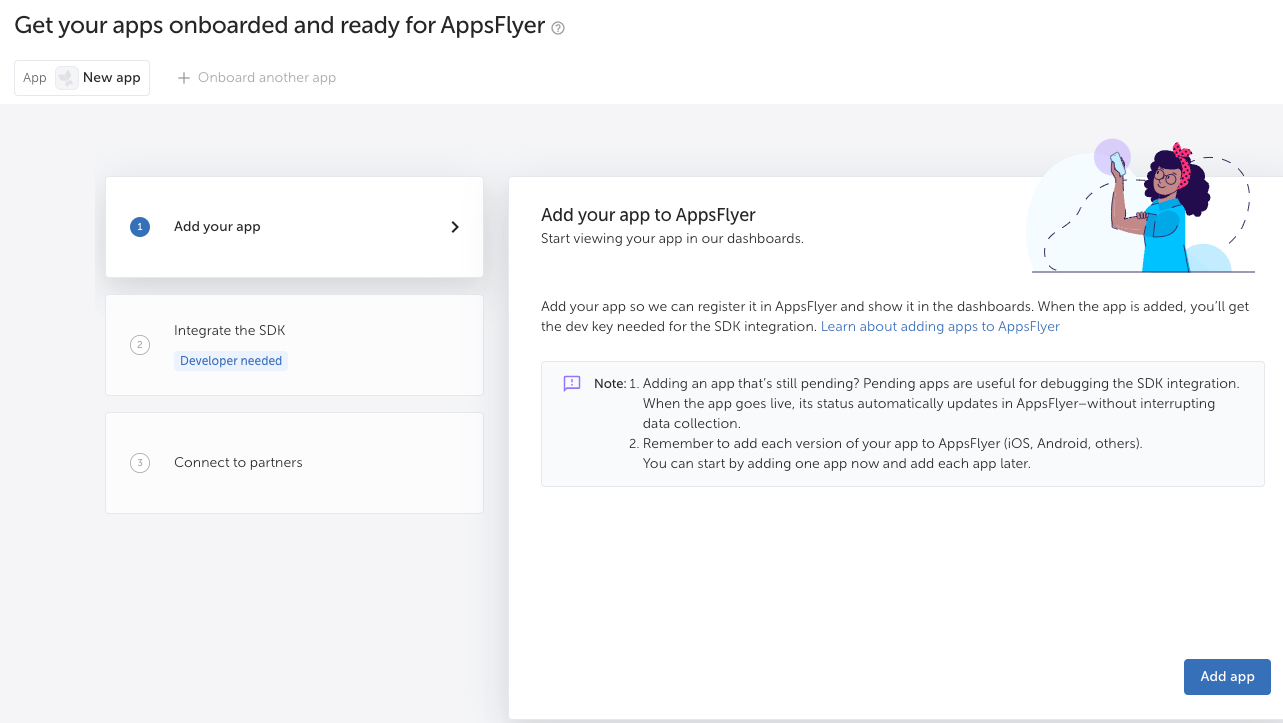
After logging in, you’ll land on a page prompting you to add your app. Just click “Add App.”
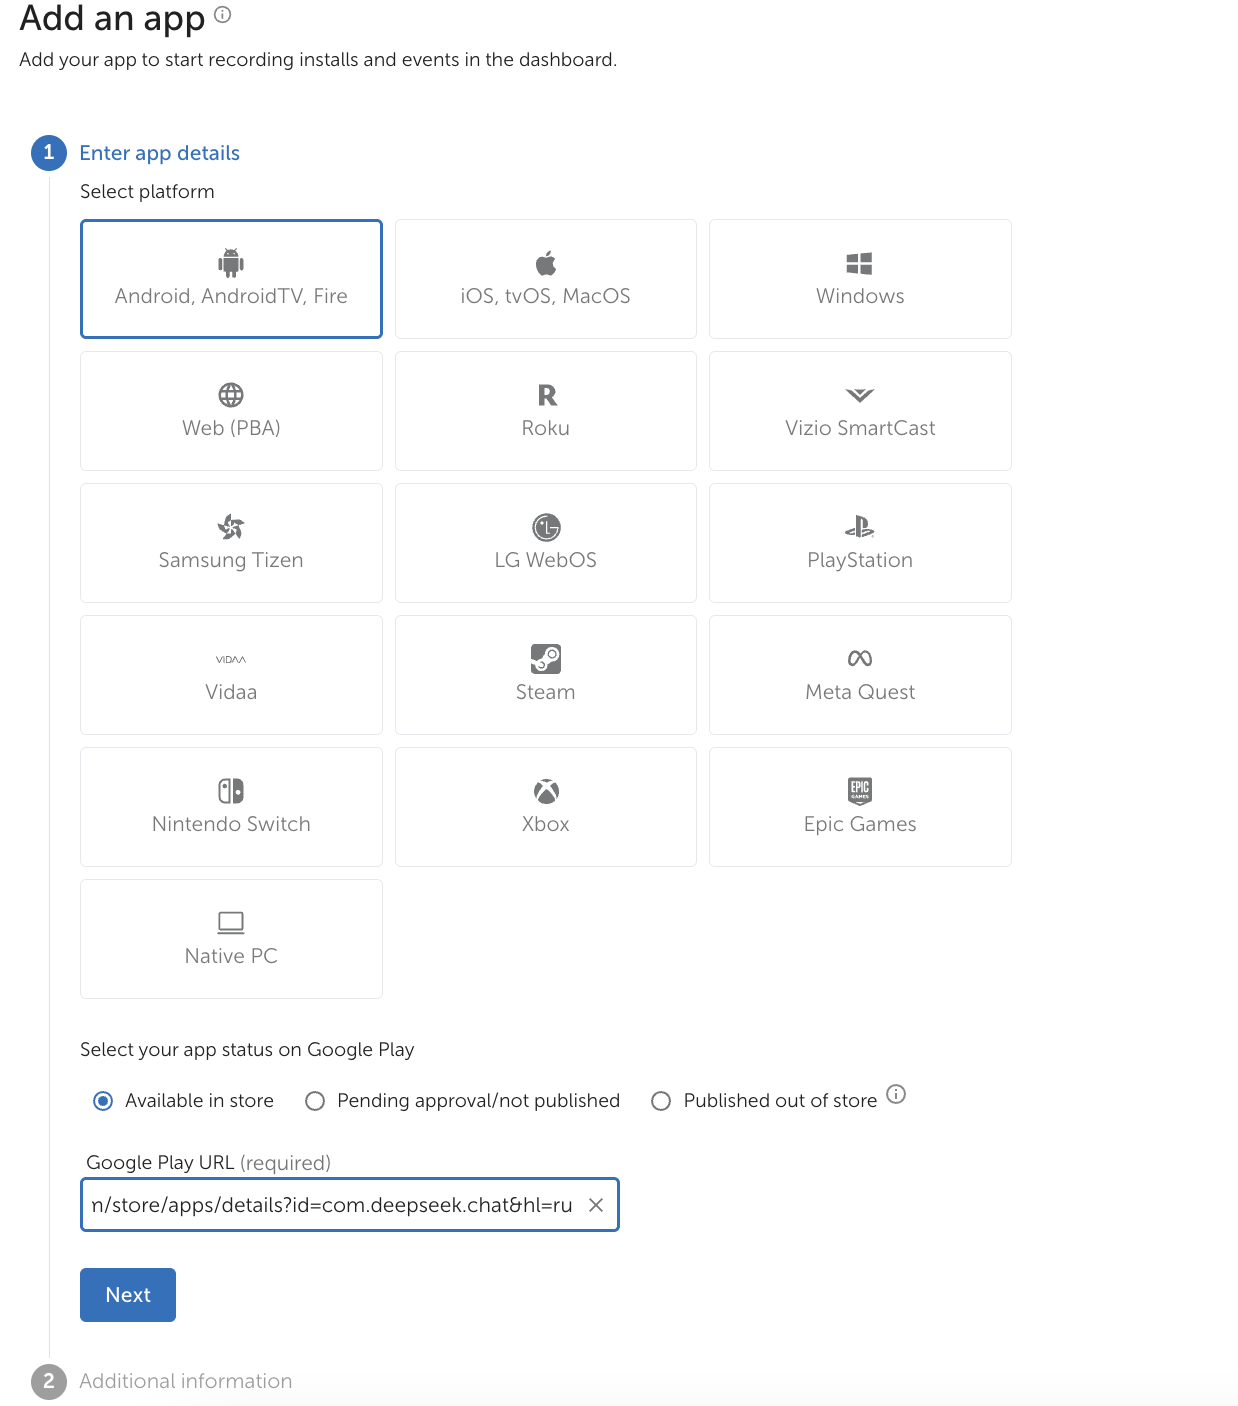
In the popup, choose the platform, status, and paste your app’s link.
If the app is pending approval, select the store’s country and enter your App ID.
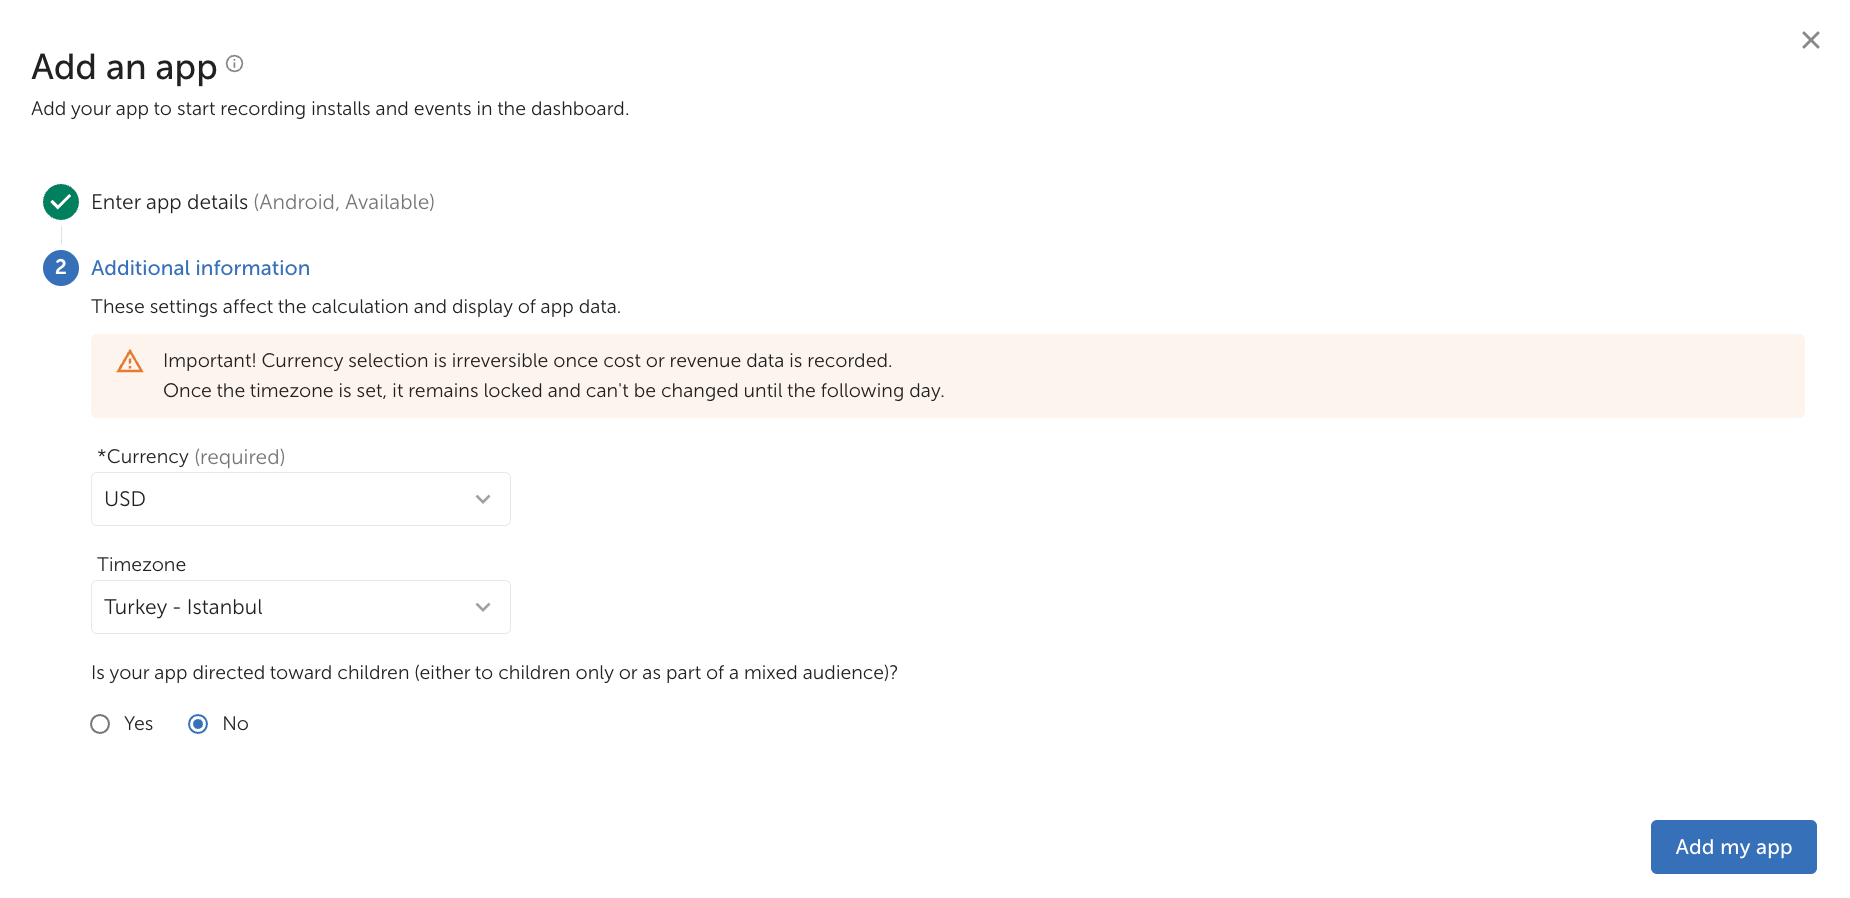
Next, select currency, time zone, target audience, and click “Add My App.”
Copy your Dev Key and hit “Close.”
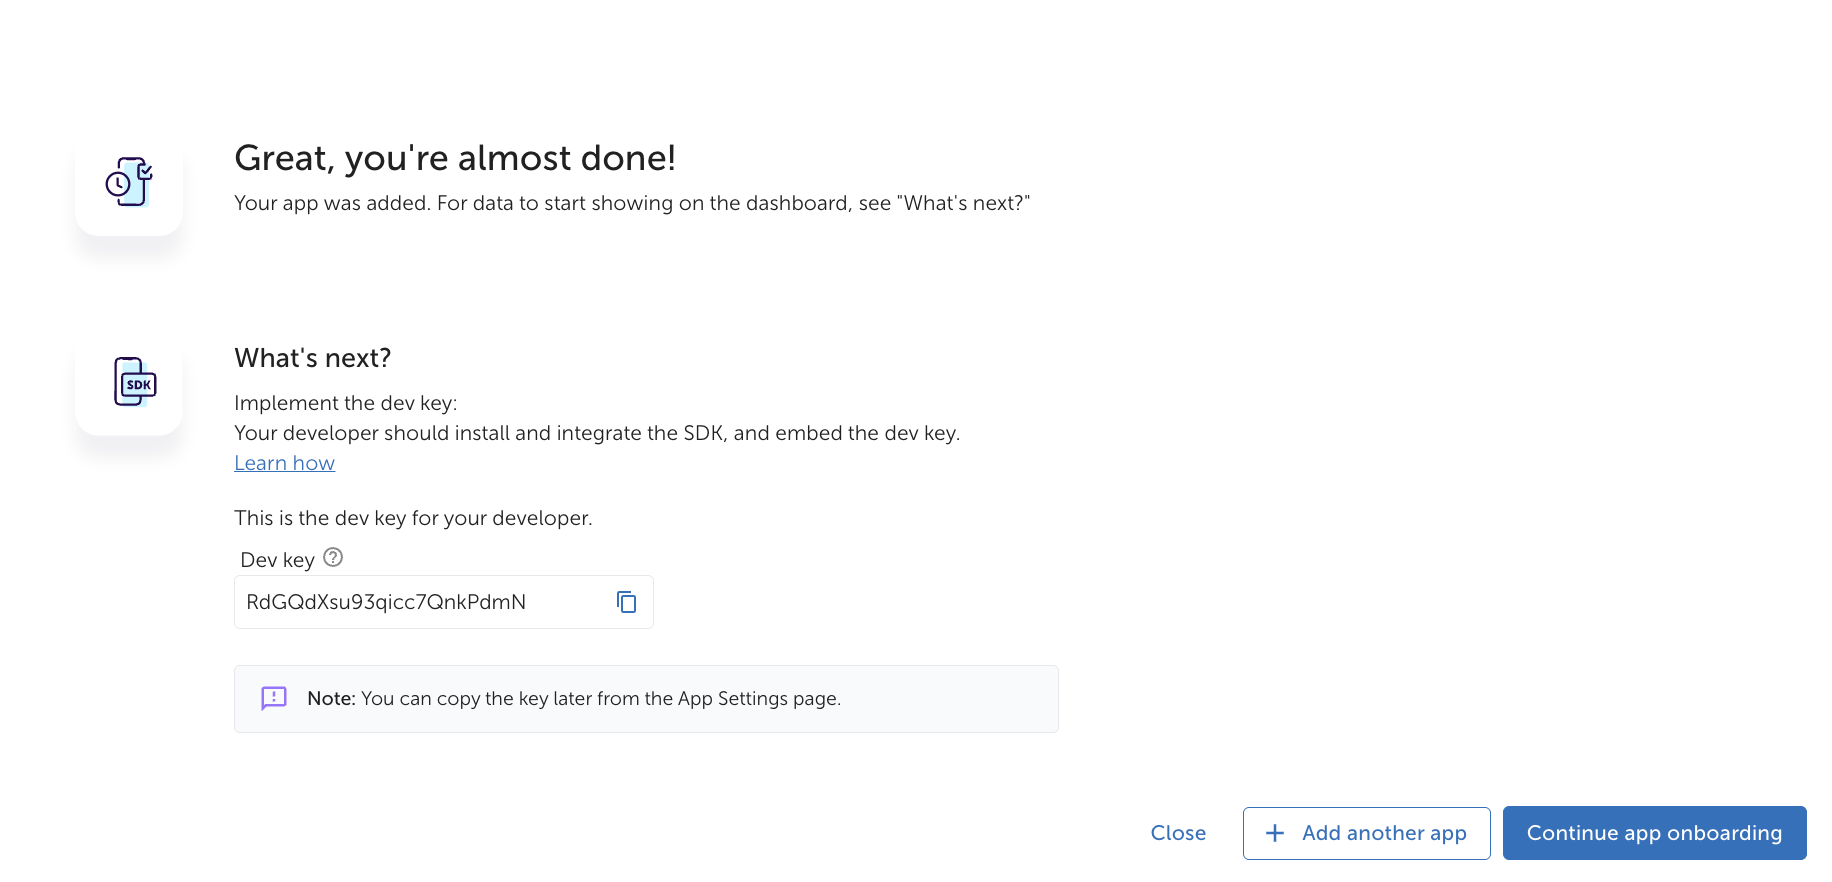
Send the Dev Key to your developer to integrate the SDK — here’s the integration guide.
Then add in-app events to track — install, signup, deposit, etc.
Now register a test device. Ask your developer for the device ID and type.
Each step has a built-in guide to help you out.
Step 3: Connect Moloco + AppsFlyer
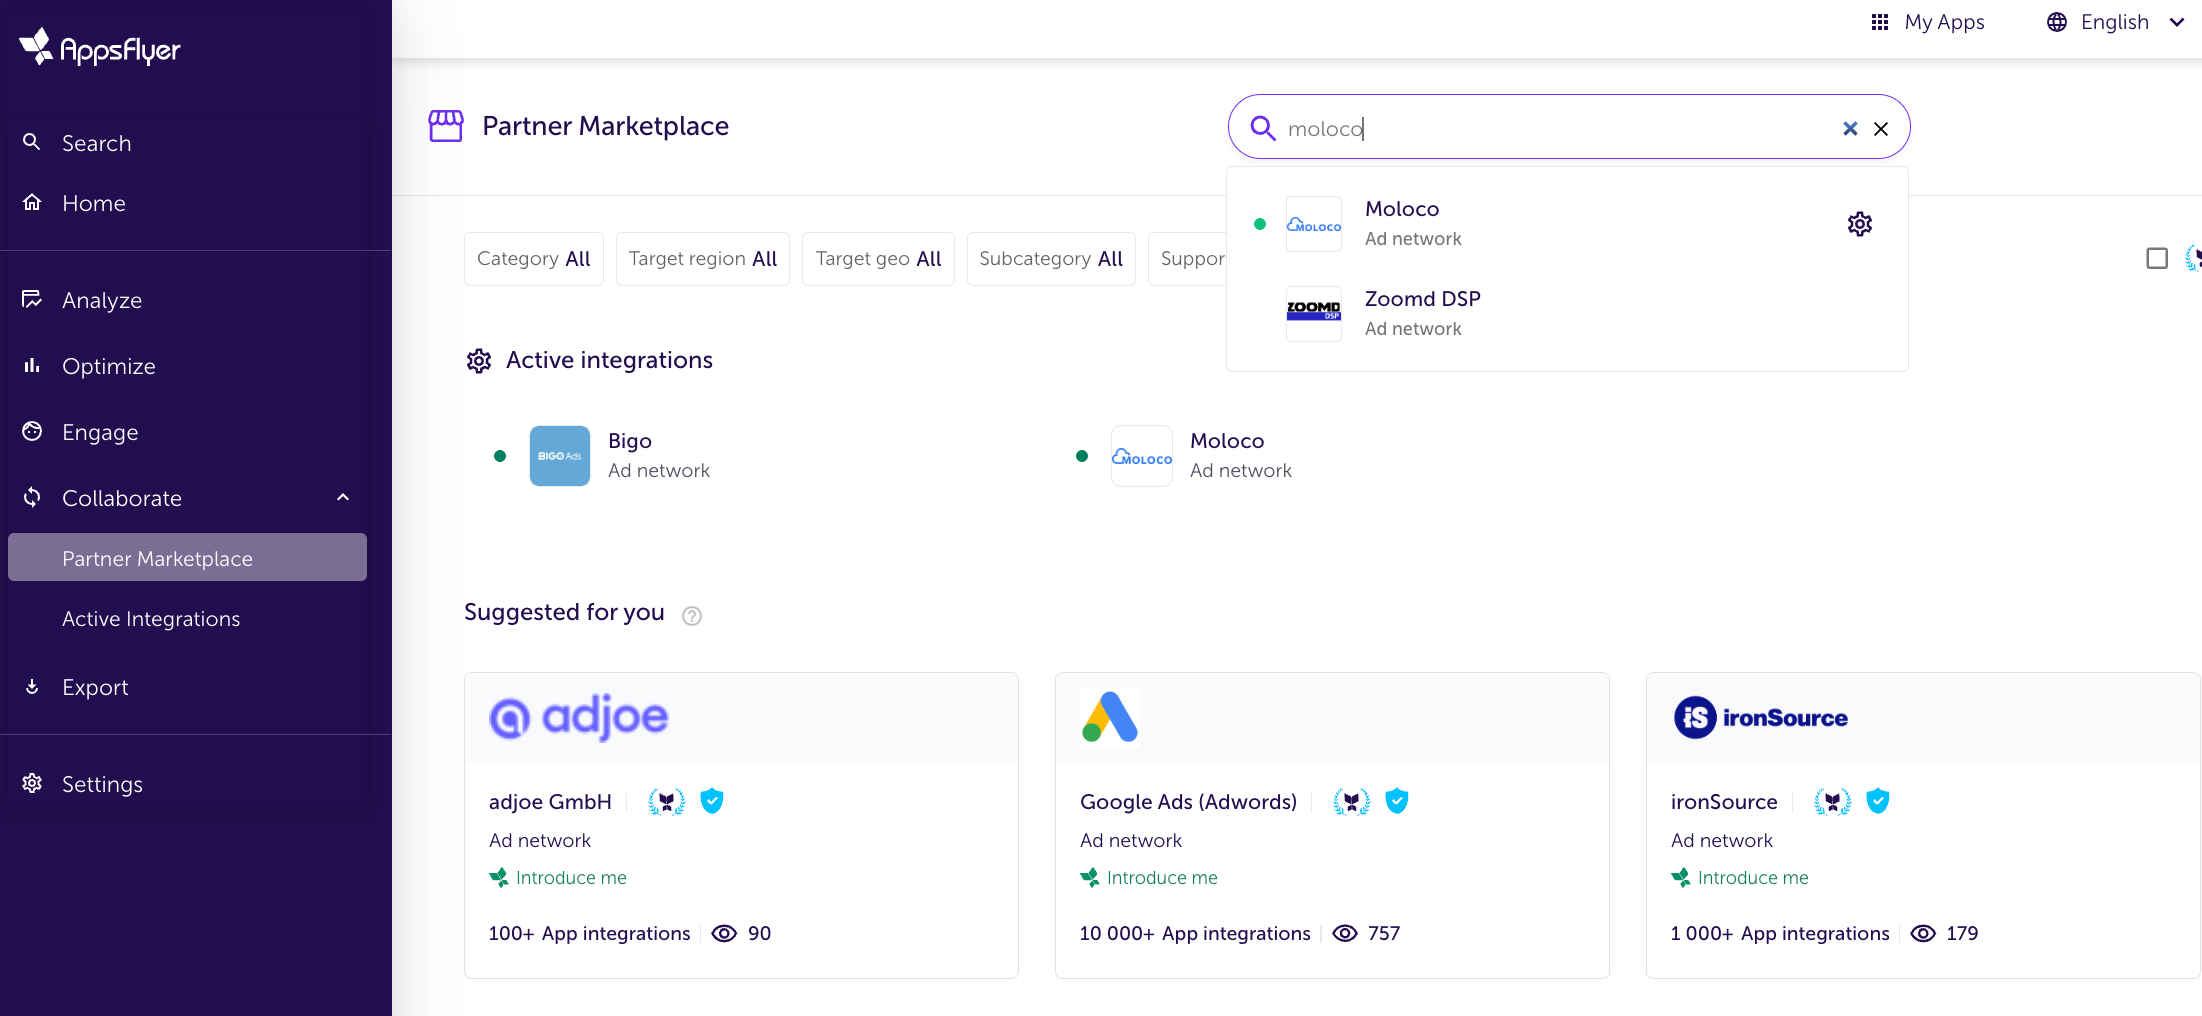
To link Moloco with AppsFlyer, go to the “Partner Setup” tab and click “Explore more.”
Search for “Moloco” in the partner marketplace and select it.
On the Moloco page, click the “Add Integration” button.
The setup process depends on the OS. Let’s start with Android. Use the exact settings shown below:
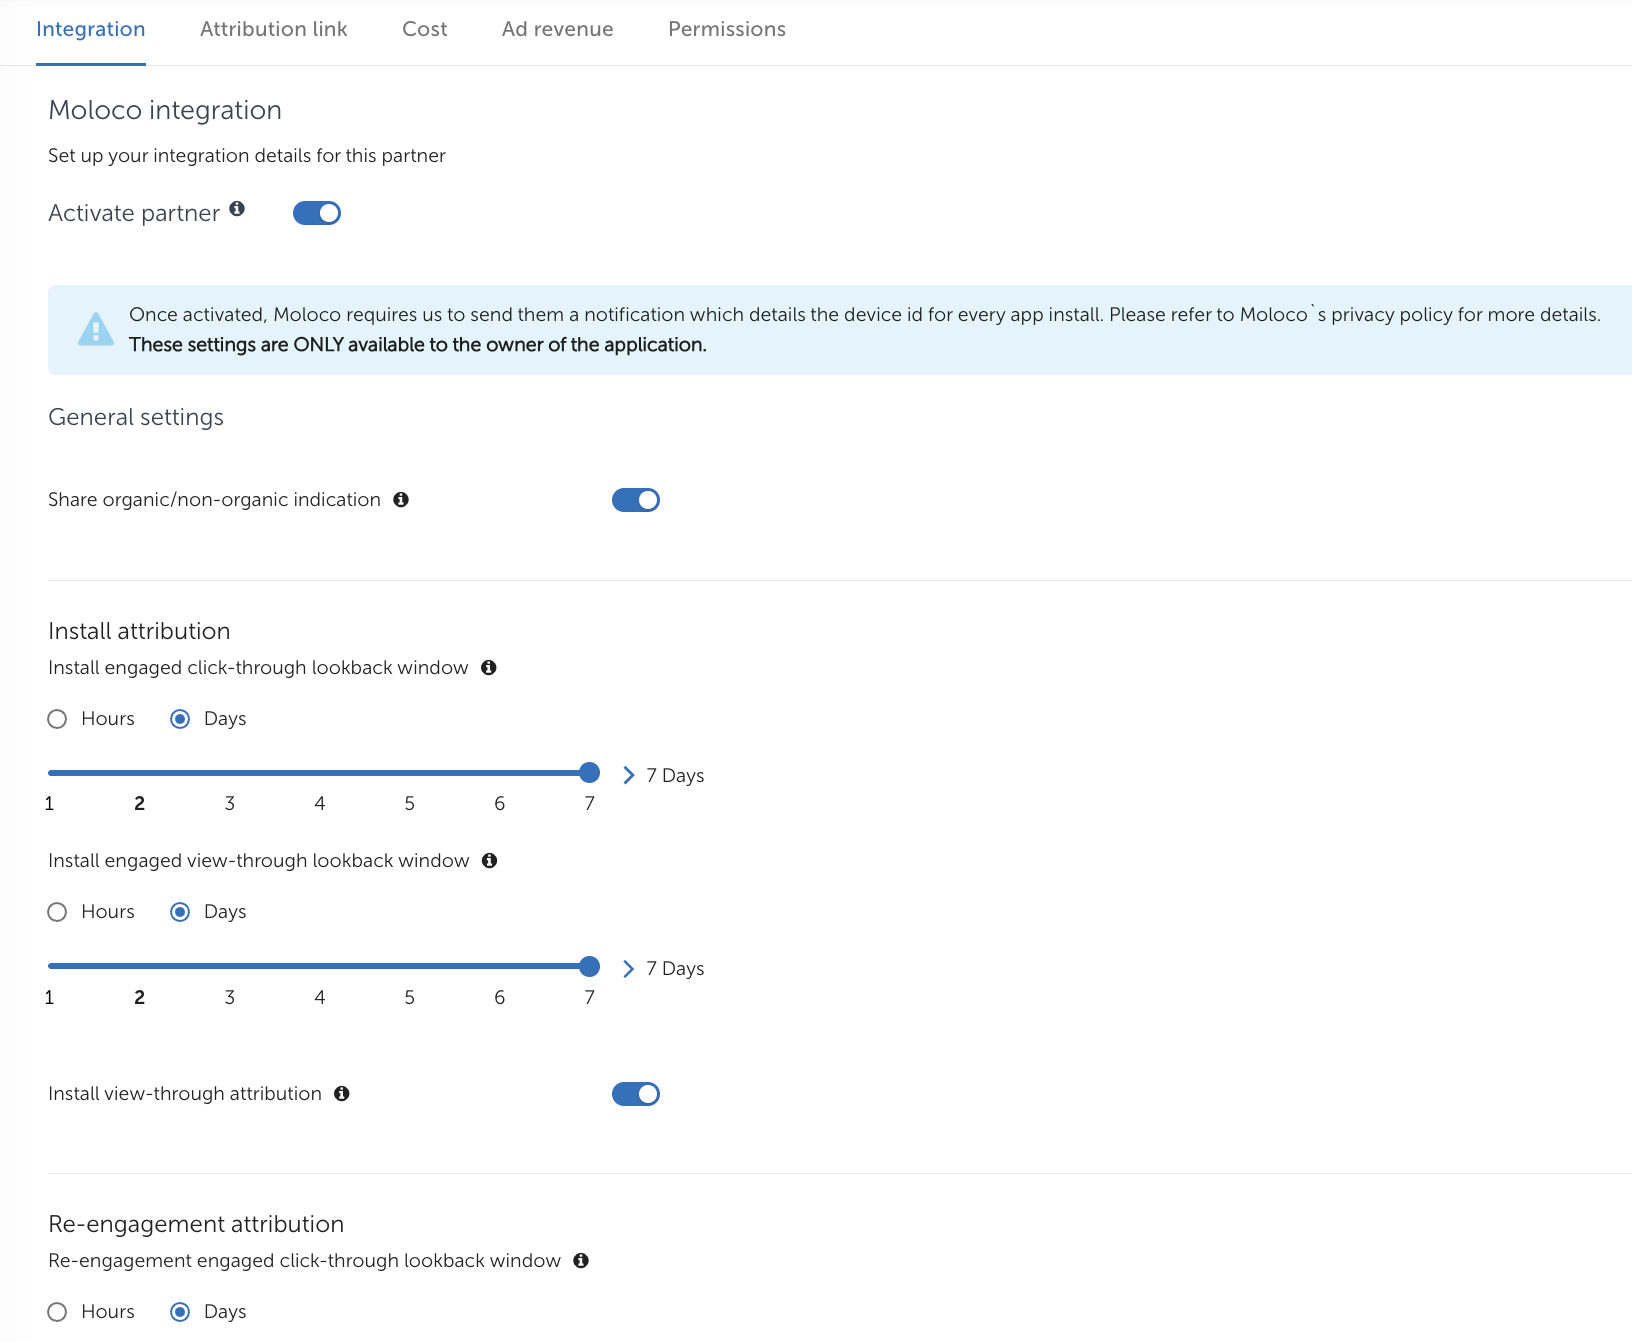
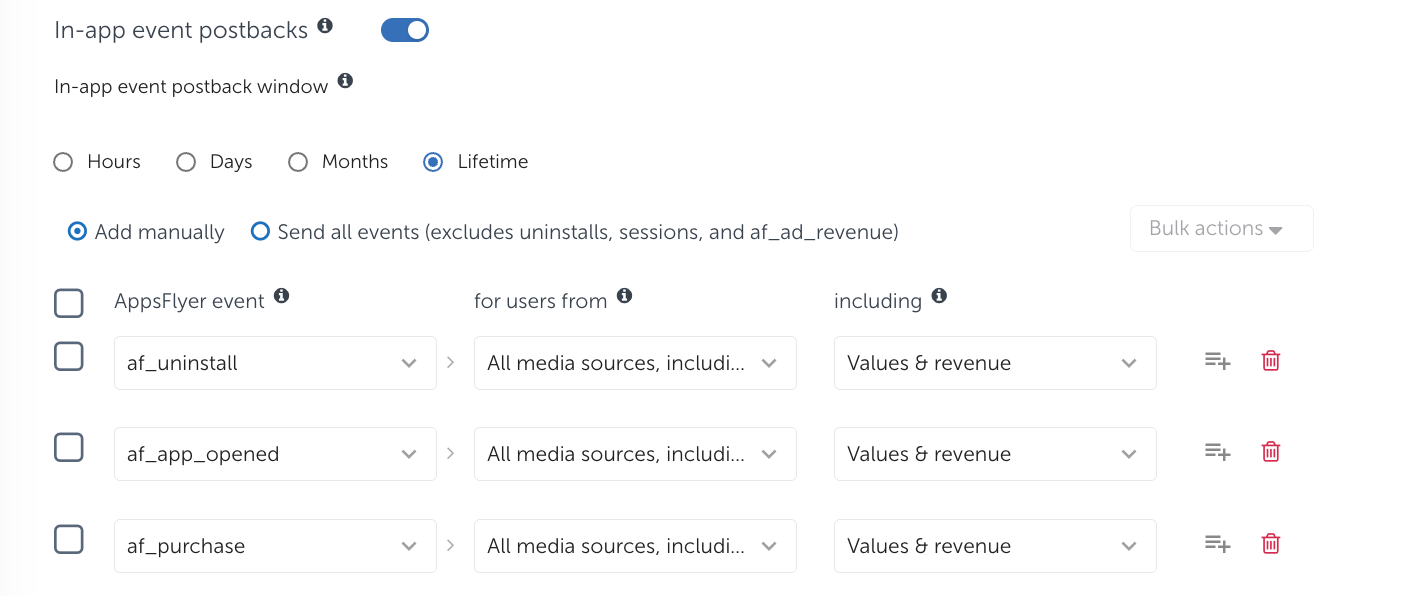
You can add any relevant events, but af_app_opened is mandatory.
This event tells the tracker, “the user actually opened the app.” Without it, sessions aren't counted, retention doesn’t work, and ad stats will be incomplete.
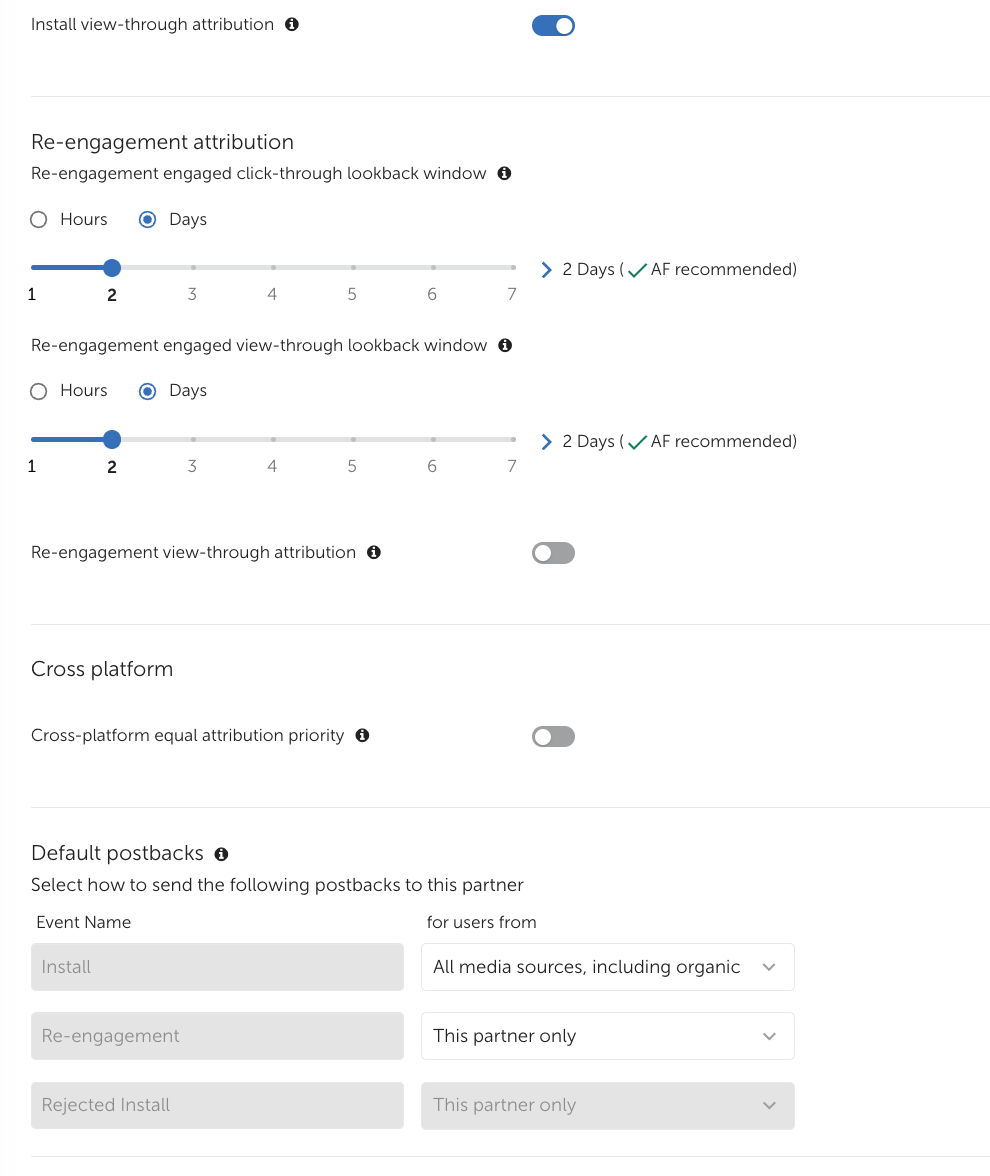
Now for iOS. The key difference — you need to disable “Aggregated attribution based on differential privacy.”
Go to the sidebar, open “Settings,” click “App Settings,” uncheck the box, and save.

This setting limits data sent to trackers, breaking attribution and optimization. It only applies to iOS.
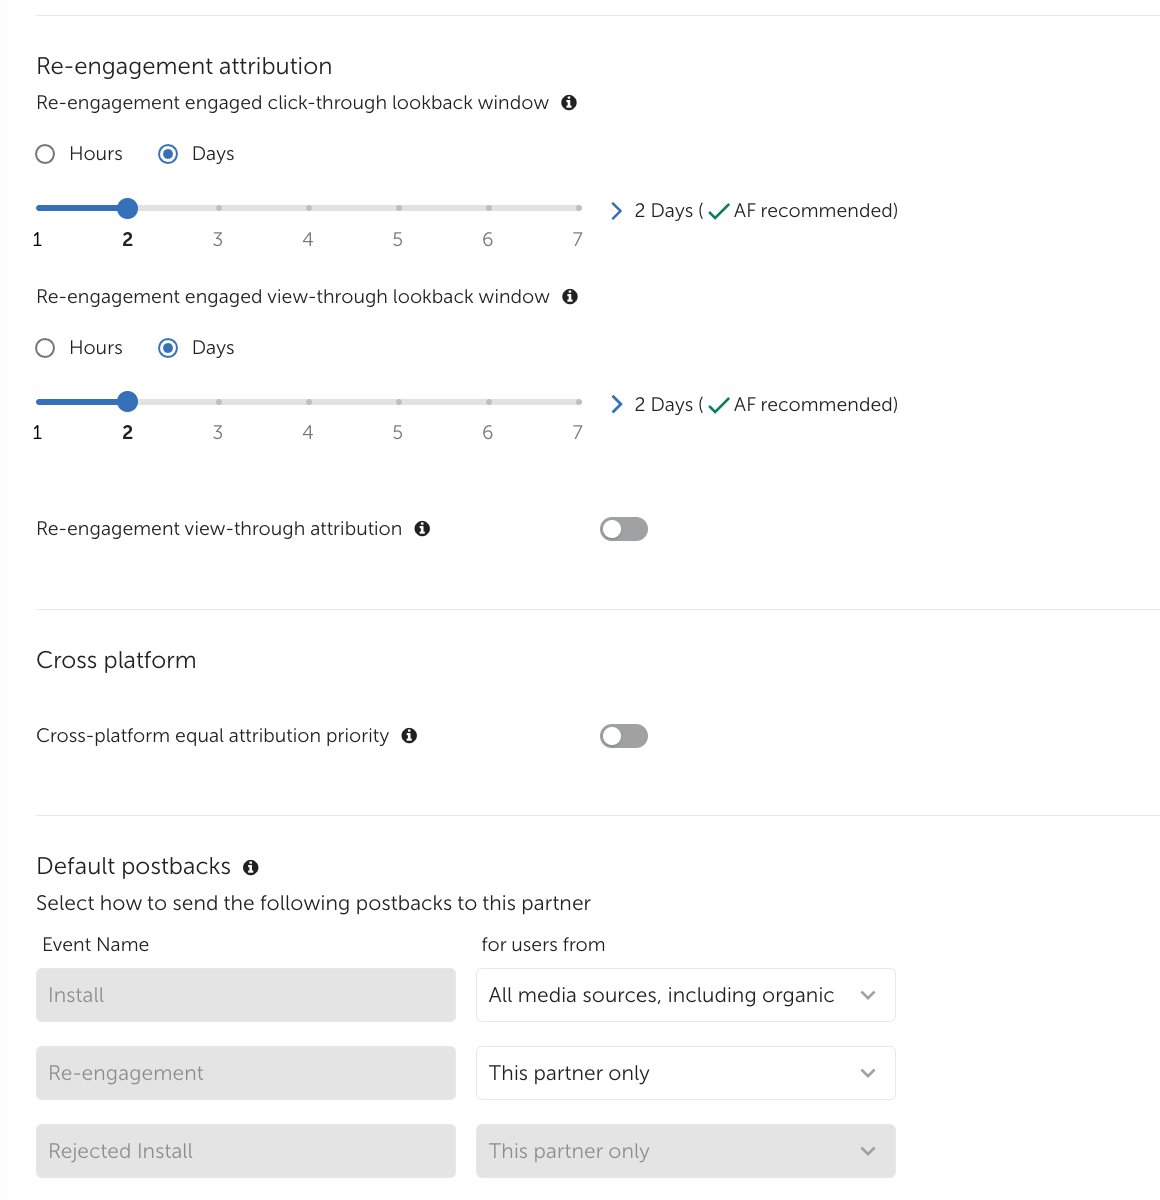
Now go back and use the settings below:

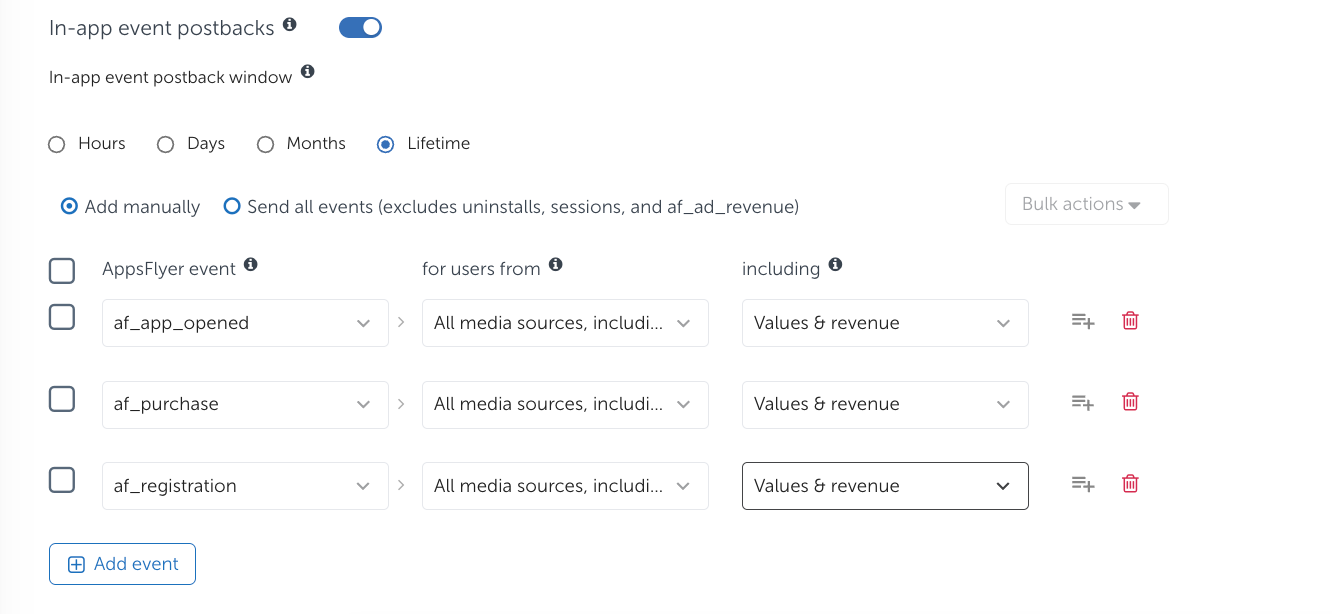
Reminder: af_app_opened must be included — everything else is optional.
To finalize the setup, go to the “Cost” tab.
Here you need to enter the API credentials of your Moloco agency account.
If you don’t have a Moloco account, you can get one through the agency account and virtual card rental service RentAcc. They can also assist with setting up Moloco + AppsFlyer.
Once you've added the details and tested the connection, save the settings to activate them.
The integration is now complete — you can view all campaign data.
Conclusion
The MOLOCO + AppsFlyer combo is a stable solution for mobile app arbitrage.
The platform automates traffic buying, and the tracker tracks performance.
The result: precise data, less fraud, and more scaling opportunities across traffic types.
To launch: get an agency account, connect your tracker, set events, and turn on data transfer.
From there — it’s all about scaling. Fully compliant, no bans, no manual hassle.